My blog is all about finding the “beauty within” something: your home, an outdated furniture piece, every day life, and even a fallen tree limb. Yes, I said a fallen tree limb. We had a bunch of fallen tree limbs in our yard and I thought what can I make with these? Then my brilliant idea came, a Halloween Tree! Let me show you how easy it is to make this DIY Outdoor Halloween Tree.
Recently, we had Hurricane Ian come through Florida. We were very blessed and did not have a lot of damage when so many others did. Our thoughts and prayers go out to anyone who did have damage or any loss from the storm.
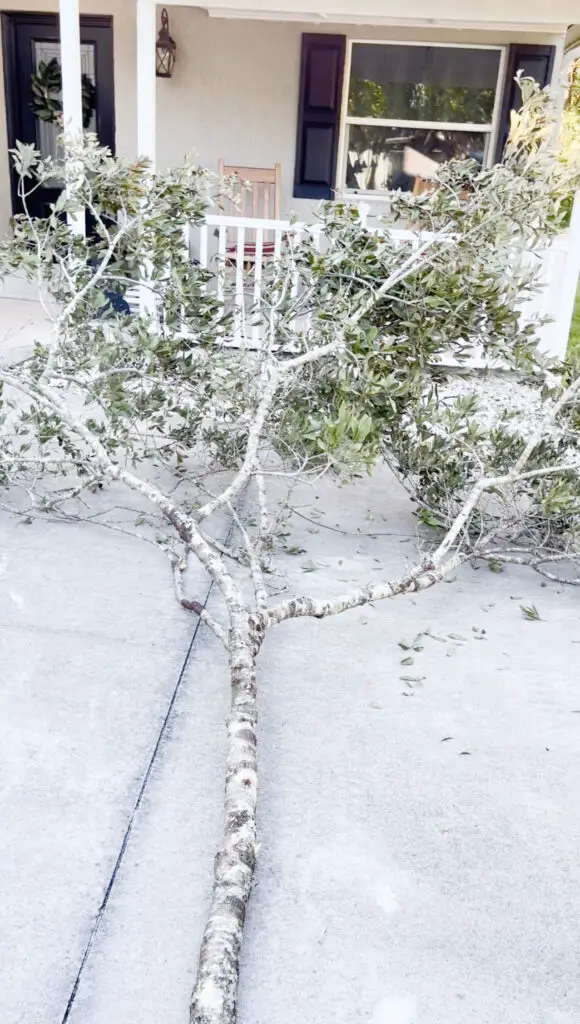
However, we did have quite a few fallen tree limbs. As we cleaned up the debris, I just thought how can I turn these limbs that would have gone in the trash into something. That is when the idea came to me to make a DIY Outdoor Halloween Tree. I had the vision in my head and it actually turned out so much cuter than I even pictured! Don’t you love when that happens?
MY DIY OUTDOOR HALLOWEEN TREE SIZE
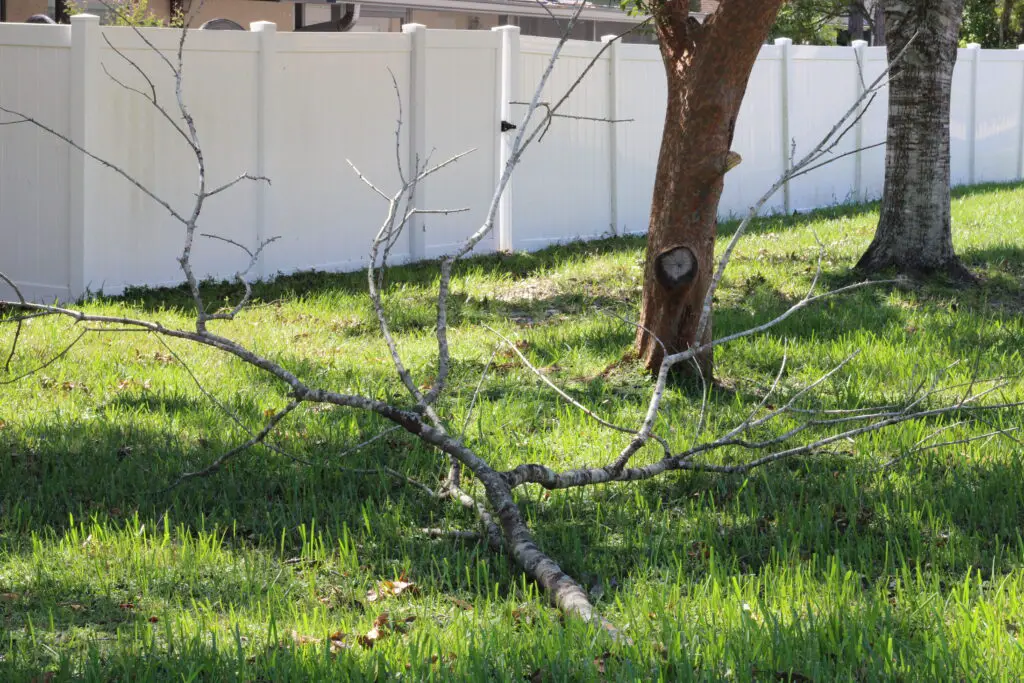
Now, I was going to select a smaller limb at first but that wouldn’t have been as fun and realistic. A tree is big! My tree needed to be big too! This is also when my husband is watching me and shaking his head. Then, I found this beautiful, big limb and knew it was the one!
So, if you would prefer, you can of course make a smaller Halloween tree. For that matter, you may want your tree to be an indoor tree. So take in to account that it needs to fit through your doorways. If you want to make a huge one, tell your hubby to calm down and that it will look amazing in the end!
Conclusion, if you ask me, the bigger the tree the better! If you ask my hubby, the smaller the tree the better!
MY DIY PARTNER IN CRIME – MY AMAZING HUBBY
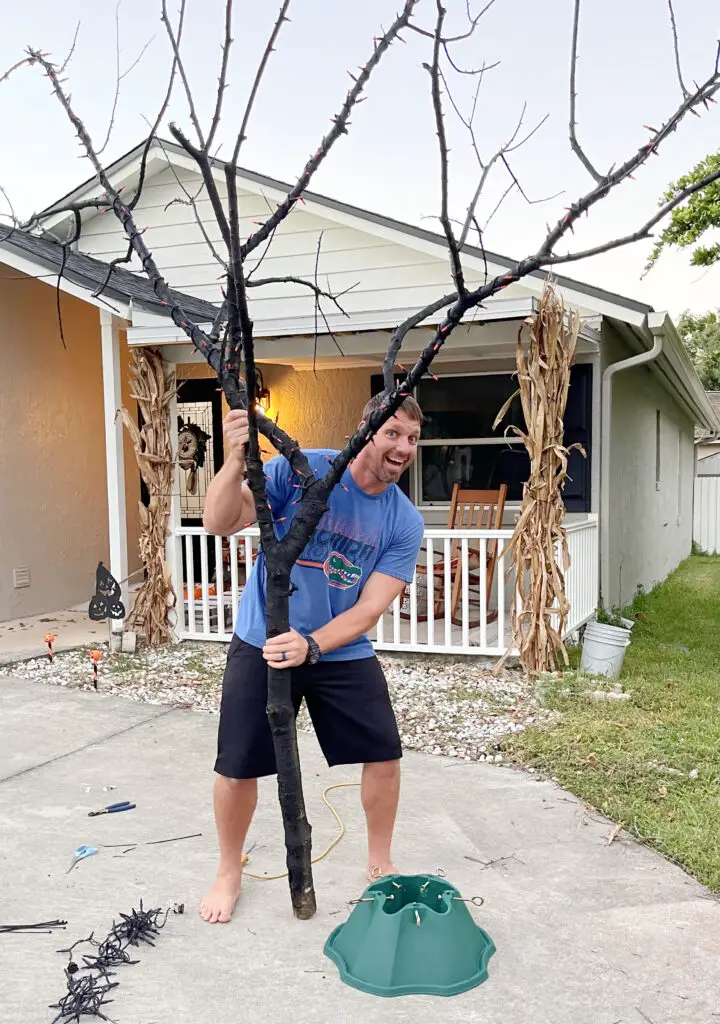
First, I have to give a shoutout to my amazing, goofball husband who goes along with all of my crazy projects and ideas! He sees me with a tape measurer and just says “Ok what are we doing now?” He is the Chip to my Joanna and I couldn’t do all this fun stuff without him! Love ya handsome!
MATERIALS AND SUPPLIES
This post contains affiliate links, as a participant in the Amazon Services LLC Associates Program, an affiliate advertising program designed to provide a means for us to earn fees by linking to amazon.com and affiliated sites at no cost to you. See my full disclosure here.
A tree limb (If you ask me the bigger the better, if you ask my hubby the smaller the better haha!)
Black Spray Paint (We used 3 cans on my limb)
Halloween Lights (I used 3 strands of orange lights)
Halloween Decor to hang from the tree (Use anything you would like: Ghosts, Jack O Lanterns, etc)
Black Zip Ties (These are if you need to secure the tree with zip ties or to hold a decoration in place on the tree limb)
SHOP THE LOOK
Halloween Orange Lights are linked here.
Black Spray Paint are linked here.
Hanging Ghosts from the Dollar Tree are linked here.
Large Black Zip Ties are linked here.
Hanging Ghosts Pack of Three are linked here.
EASY STEP BY STEP INSTRUCTIONS:
Step One: Remove all the leaves and smaller branches from tree limb. I just used a garden clipper and clipped them off.
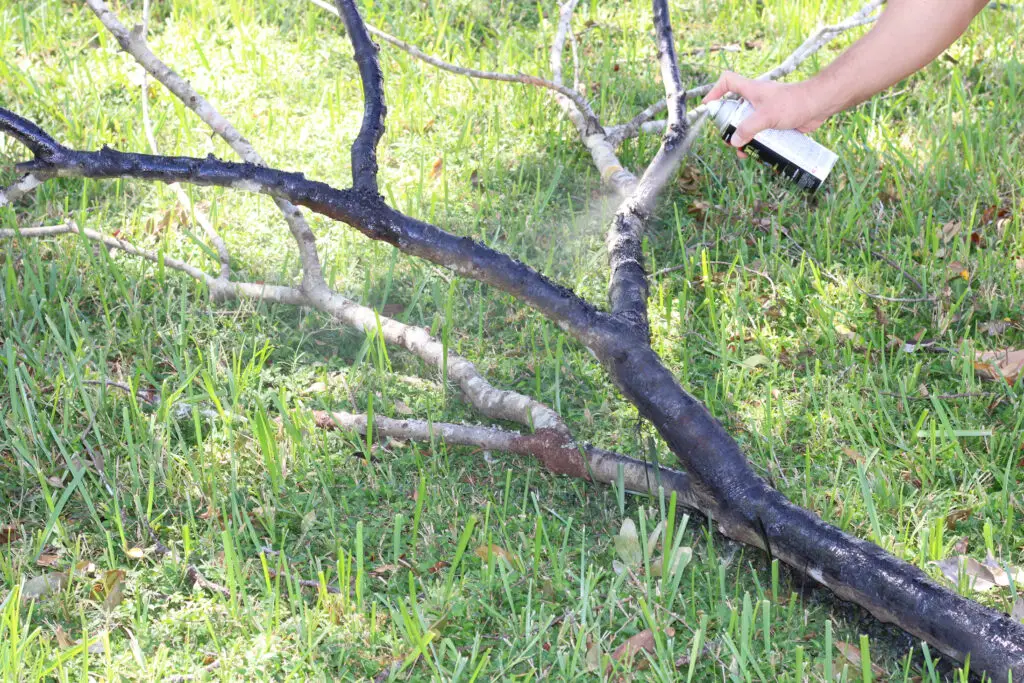
Step Two: Paint the limb black. Spray paint the entire limb black. I used 3 cans on my big limb.
Step Three: Put on the Halloween lights. While the tree is still on the ground, wrap the lights on the tree. This just makes it easier on you.
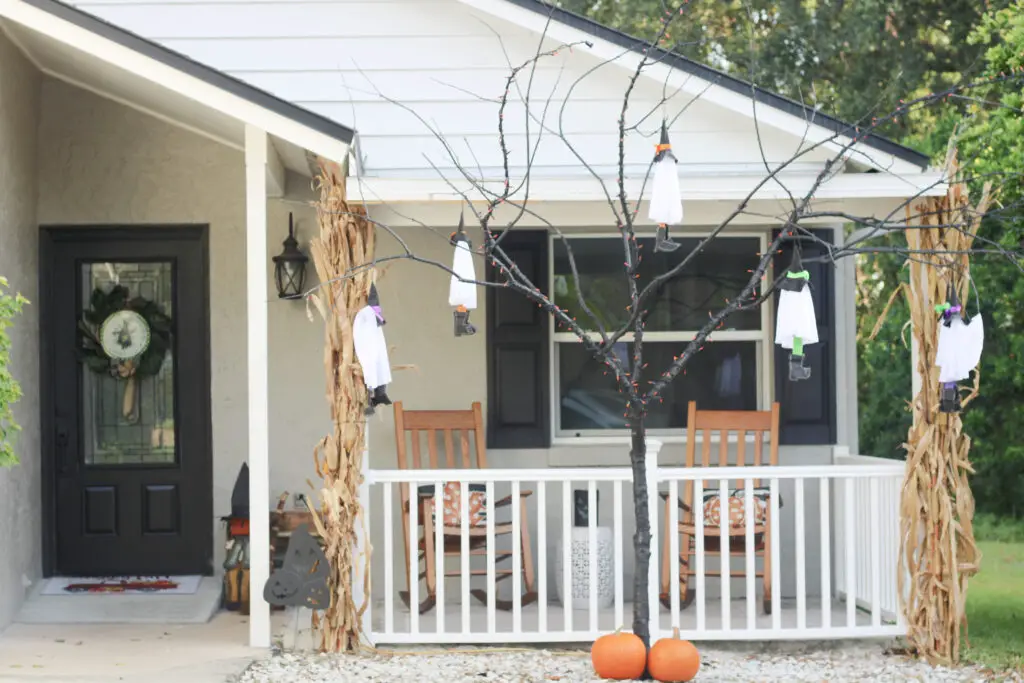
Step Four: Put your tree up. You can put your tree in a Christmas tree stand, or we just stood it up in front of our porch and zip tied the top branches to the porch.
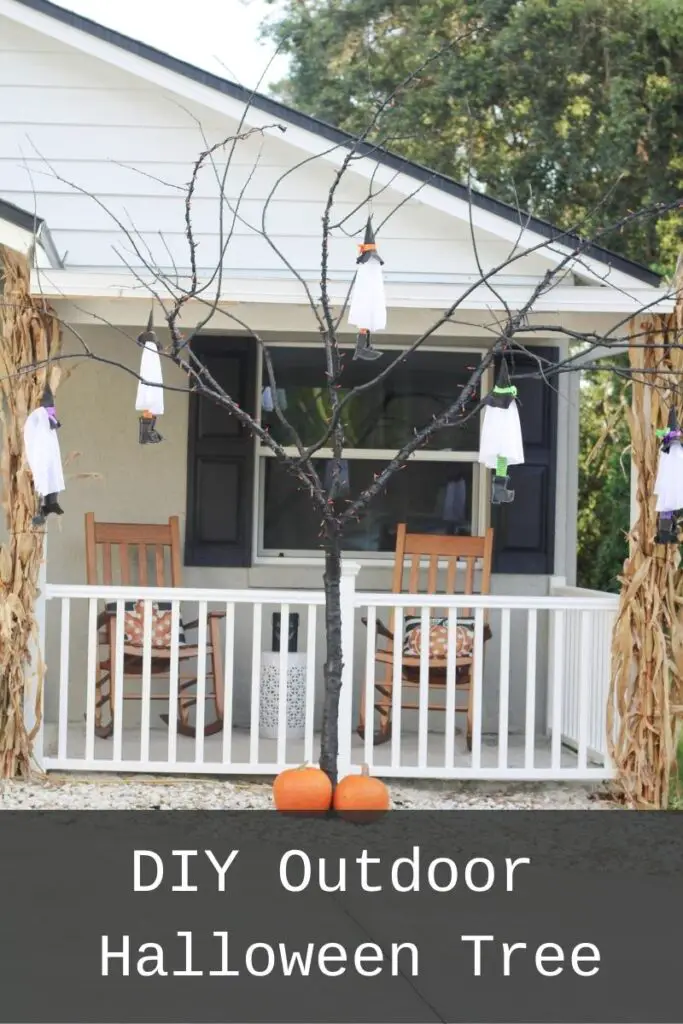
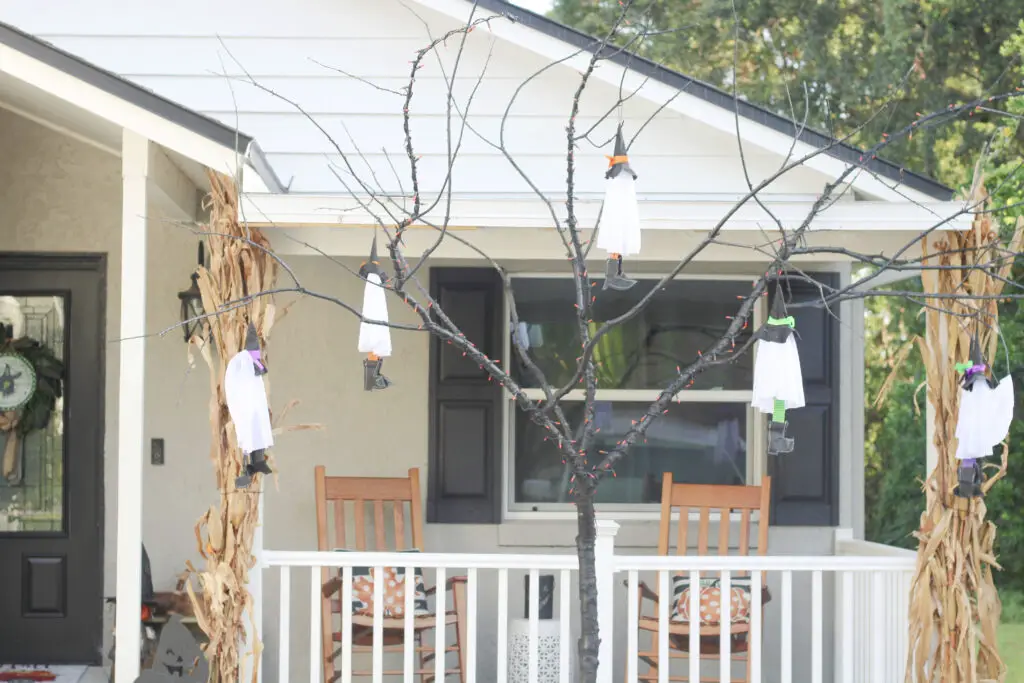
Step Five: Decorate the tree with Halloween decor. You can choose any decor you would like. I used hanging ghosts. You can use Jack O Lanterns, Pumpkins, Ghosts, Witches, etc.
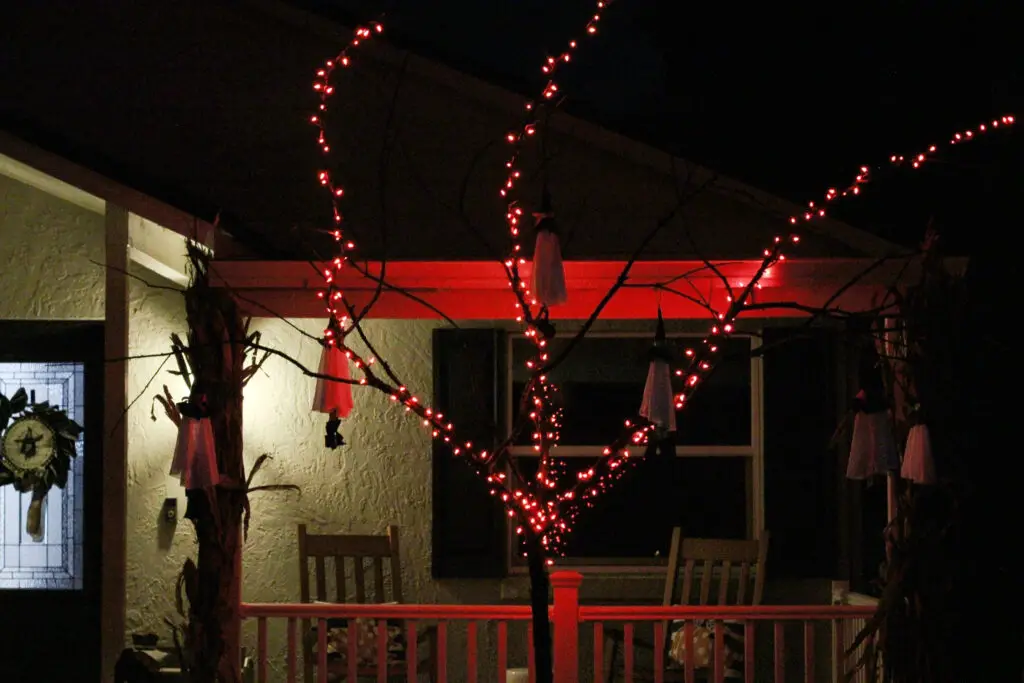
That is it! You are done! I love how this DIY Outdoor Halloween Tree turned out! It looks so cool and I love how it lights up at night.
HOW MUCH DOES IT COST TO MAKE THE DIY HALLOWEEN TREE?
This Easy DIY Outdoor Halloween Tree only cost me $25 to make. A Halloween tree of this size at the store would be over $100. If you can get the same look for less, why not? Of course, I am going to show you how to do it too!
MAKING THINGS INSTEAD OF BUYING AND SAVE MONEY
There is just something about being able to say I made that. I love filling my home with DIY Projects and crafts that I made, it just feels more special and surrounds me with things that I created. Also, it saves you money.
WOULD I EVER MAKE A DIY OUTDOOR HALLOWEEN TREE AGAIN?
Yes, I absolutely love how this tree turned out! It was so simple and affordable to make. It looks so cool and I love how it lights up at night. Maybe I will go bigger next year! I am just kidding hubby!
DIY OUTDOOR HALLOWEEN TREE
I hope you loved this DIY Outdoor Halloween Tree and it gave you some fun Halloween inspiration. If you end up making it, let me know in the comments below. As always, go create, have fun, and “find the beauty within your home.” Thanks for stopping by our Faux Florida Farmhouse today and every day! We love having ya! Until next time friend.

Leave a Reply