These DIY bifold barn doors are beautiful and affordable! The best part is they go right over your existing doors. I am going to show you how you can add them to your home with this easy tutorial.

This post contains affiliate links, as a participant in the Amazon Services LLC Associates Program, an affiliate advertising program designed to provide a means for us to earn fees by linking to amazon.com and affiliated sites at no cost to you. See my full disclosure here.
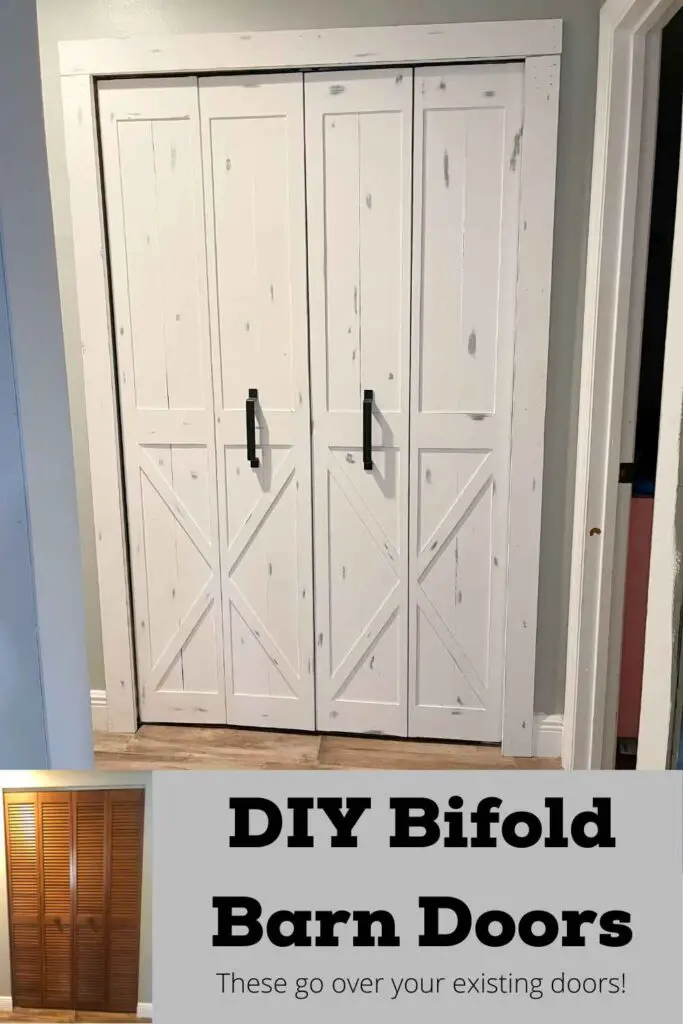
Learn how I made these DIY bifold barn doors with this easy tutorial. You can build this right over your existing bifold doors which makes this a very easy and affordable project.
The total cost for the project came out to around $50. If you hired a company to custom make these for you it would be hundreds of dollars!
We live in a home from the 80s with the lovely shutter-style dark wood bifold closet doors. Adding these DIY barn doors made it look so much better and updated the house instantly! Who doesn’t love barn doors?
Tips For Adding Bifold Barn Doors to Your Home
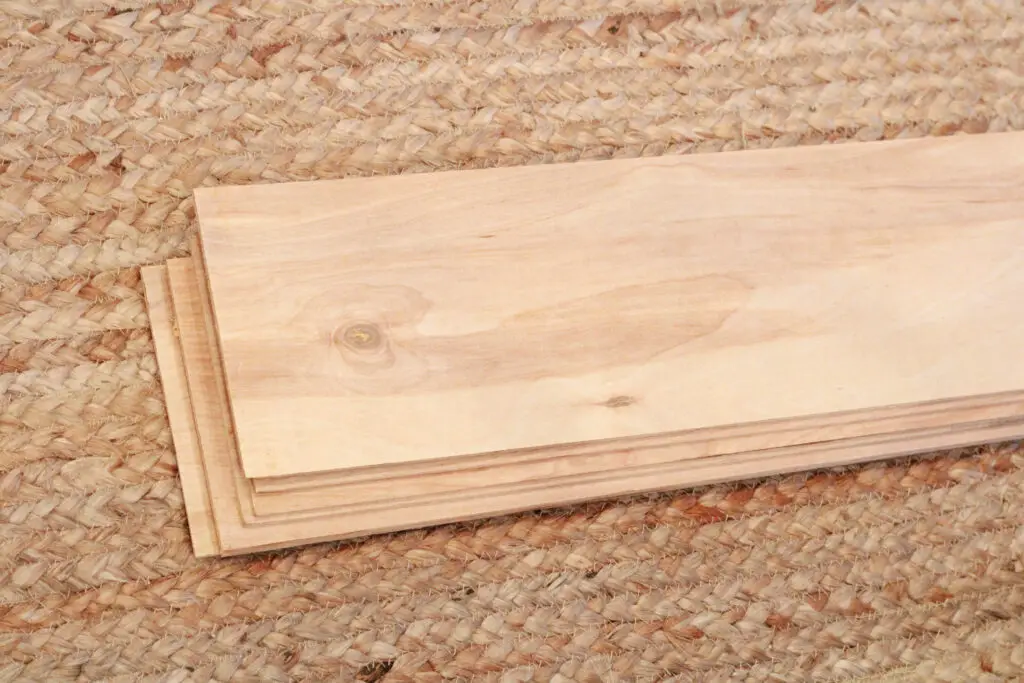
We used thin underlayment plywood 4-foot by 8-foot sheets.
When choosing your boards be sure to look for any blemishes or if they are bowed. Smooth and straight will work best for your DIY Shiplap.
Where Can You Add These Bifold Barn Doors In Your Home?
Anywhere you have a bifold door already in your home!
- Laundry room doors
- Pantry doors
- Hallway closet doors
- Bedroom closet doors
- Office doors
Supplies And Tools
- Plywood underlayment: (Number of sheets depends on the size of your doors) 4′ by 8′ plywood at 1/5″ thickness
- Circular saw: for cutting pieces to different lengths.
- Table Saw
- Wood Glue
- Clamps
- Nail gun – We bought a battery-operated nail gun and use it all the time. It is so nice not having to have the compressor. Obviously, a nail gun with a compressor works just as well. (If you don’t have a nail gun, you can of course just hammer them in).
- Hammer
- Nails
- Wood filler (This is optional, I didn’t mind my nail holes and just embraced the rustic look)
- Painting supplies: roller, paintbrush, primer, paint, stain (if you want to stain first, this is optional)
- Sandpaper
- Square
- Door handles
How To Install The DIY Bifold Barn Doors
Here are your step-by-step instructions.
Step One: Purchase Materials And Get Materials Ready For Your Project
- You can purchase through the links above or from your local hardware stores like Lowes and Home Depot.
Step Two: Prepping The Existing Bifold Doors
- Take your existing bifold doors down and off their tracks.
- Wipe them down and get any dust off.
- Take off the hardware and hinges.
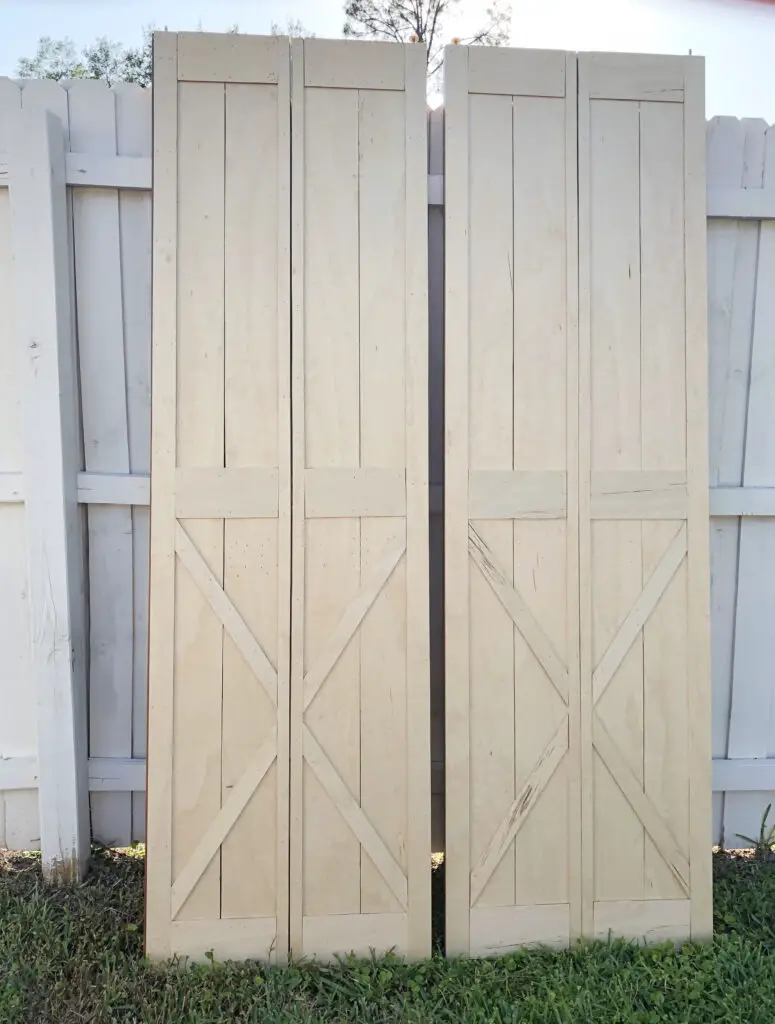
Step Three: Start Cutting
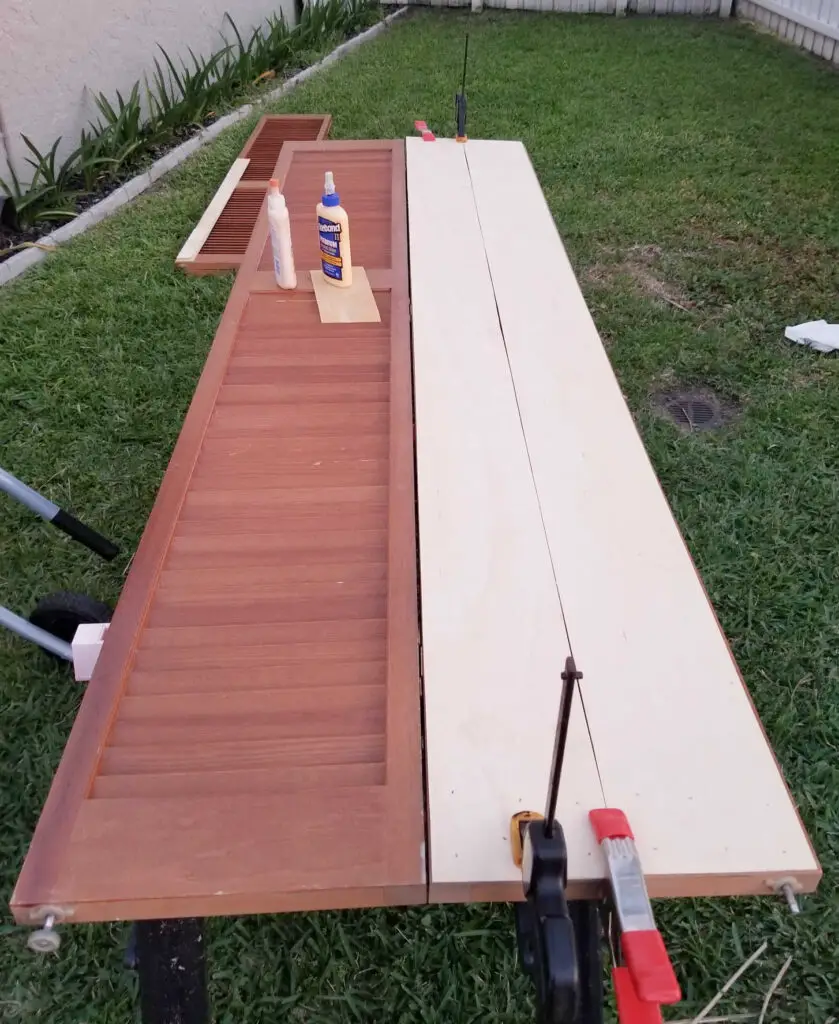
- Cut the underlayment into strips using a table saw. You can create whatever barn door design you would like. Just remember not to cover the part of the door that folds out or you will not be able to open your door. Measure and make your cuts.
- Always lay your cut pieces on top of the existing door first to make sure everything fits and looks good before you glue anything down.
Step Four: Put The Bifold Barn Door Together
- Once you have all the pieces cut and have verified they all fit and look nice, it is time to start assembling the door.
- The next step, apply wood glue to the back of the strips and adhere them to the door. You can use a clamp to apply pressure and hold them in place. Start with your bottom pieces that go directly onto the existing bifold closet doors and work your way up.
3. To add more security, you can use some nails as well. You can either use a nail gun or if you don’t have one you can use a good old-fashioned hammer and nails.
4. Once the two strips going down the door are in place, you will put on the sides, and then the top, bottom, and middle pieces.
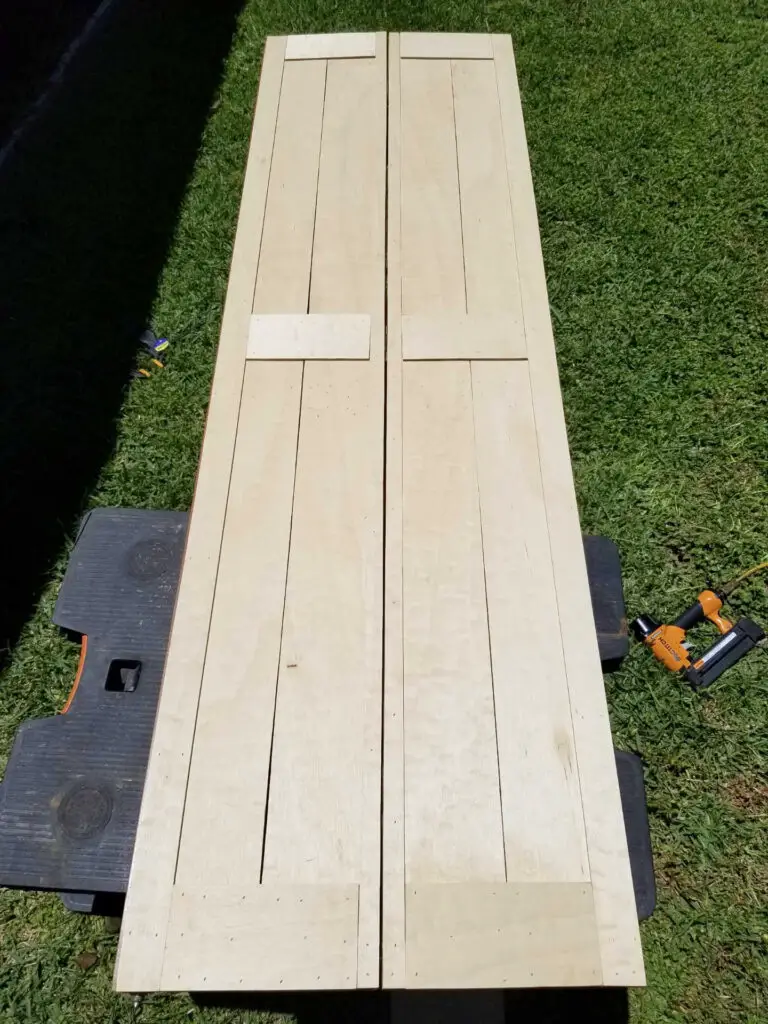
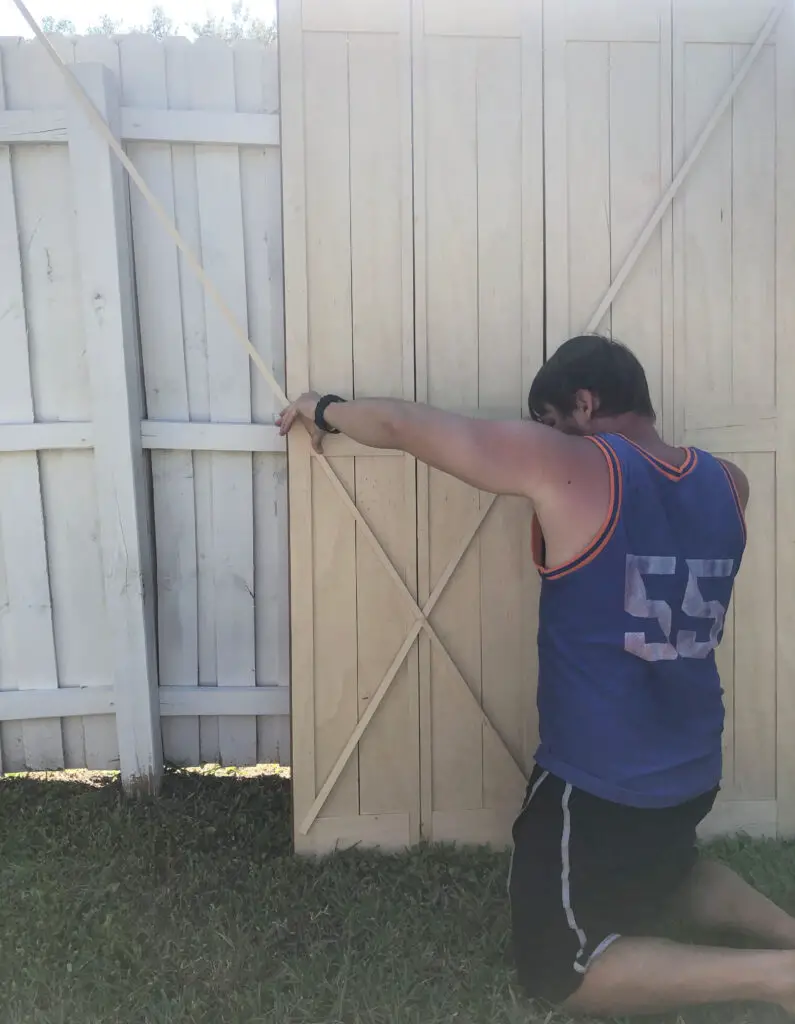
5. You can pick any barn door design that you like. Have your cute assistant or aka your hubby hold up the different designs until you decide which one you want 🙂
6. Add the design you pick.
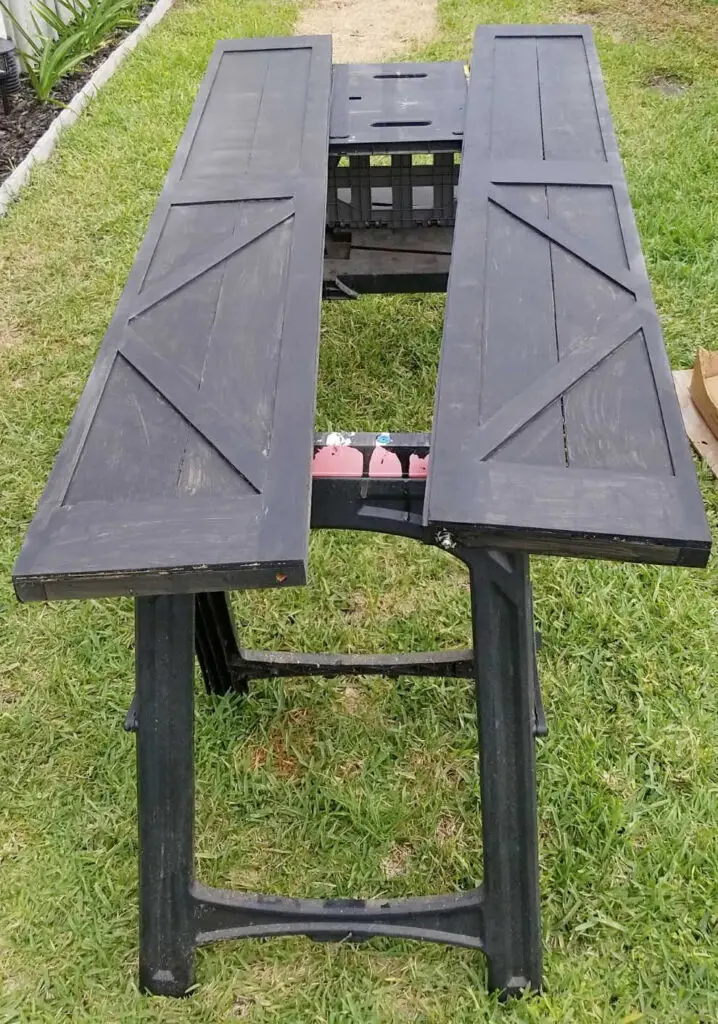
Step Five: Stain And Paint Your Bifold Barn Doors
- We decided to stain ours first and then paint it. This is all personal preference. You can use only stain, you can use only paint, you can use both like we did. Have fun and make it your own!
- I stained the doors with a dark black stain. When I work with stain, I use a rubber glove and an inside-out sock over my hand. It works beautifully and it is a great way to use up some of those socks that have lost their mates.
- Once dry, I painted with white paint. I decided to go with chalk paint for that matte look. Allow the paint to dry completely.
- Then, I came back with sandpaper and distressed the doors allowing the black stain to show through in certain areas. This is a completely optional step and depends on the look you are going for.
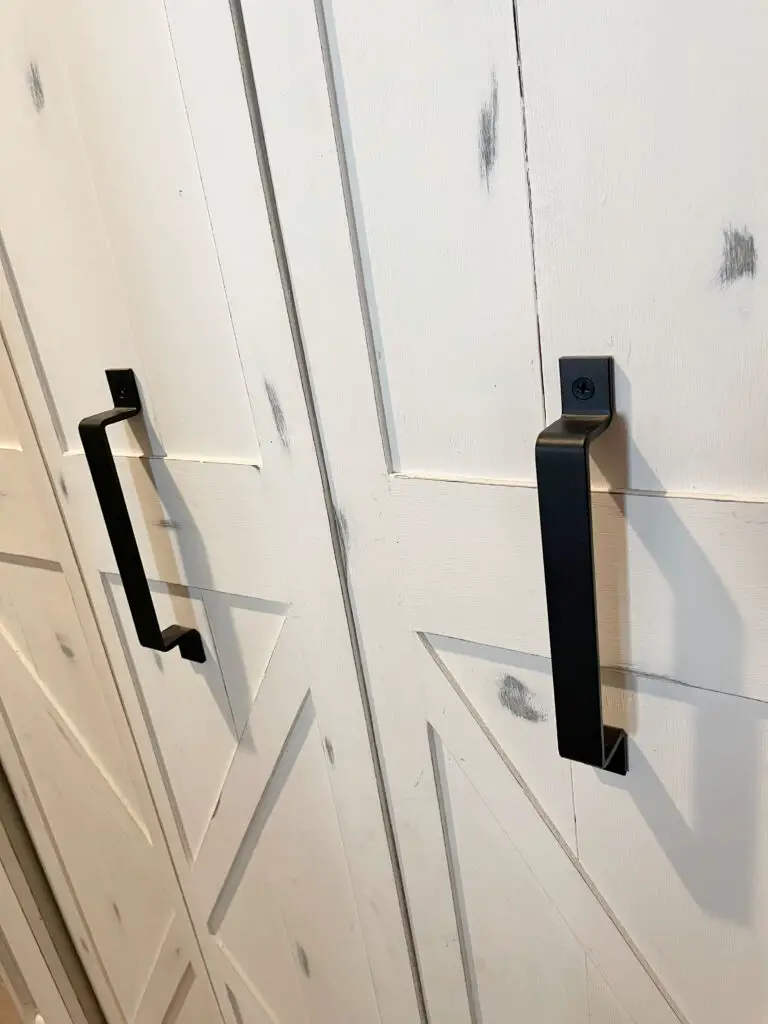
Step Six: Add The Door Handles And Hardware And Hang The Door
- We put all the hardware and hinges back on the doors.
- Hang the door back up on the tracks.
- Next, we put on the door handles.
Step Seven: Add Trim Around The Door Frame
- The trim we kept very simple and rustic. We used strips of 1 by 4 wood pieces.
- We measured and cut them down to the proper lengths.
- Once cut down, we stained them, painted them, and distressed them following the same process as the doors.
- Finally, we attached them to the wall using a brad nail gun. These made a simple and rustic frame of the door.
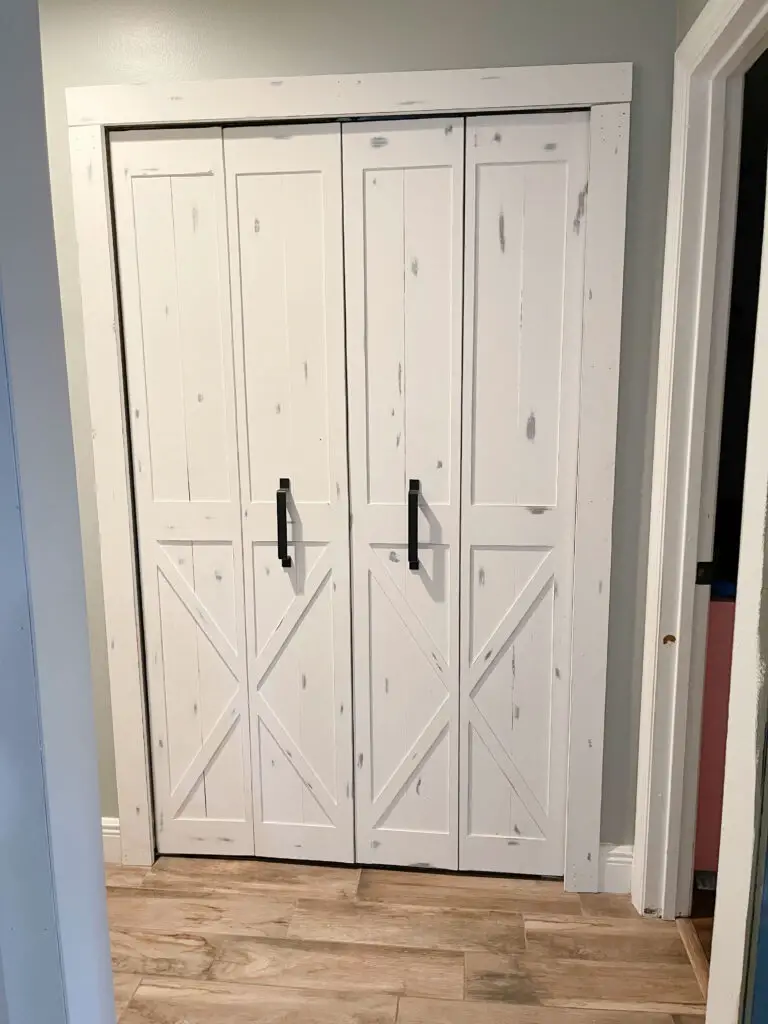
Our DIY Bifold Barn doors are done!!!
They came out beautiful! This was an easy, cheap way to make our dated and boring bifold doors come to life! The total cost of this project was around $50!
Bifold Barn Door Hardware
You can take your doors a step further and get bifold barn door hardware for your bifold closet door. These go right on top of the door and still open and function as bifold doors. I have an example of bifold barn door hardware linked here.
You will need to measure the width of your door for the proper width. Also, even though it says for 4 doors, that is for a bifold that has 2 sides. So my Bifold barn door would be a 4-door option. Hope that makes sense. Look at the pictures in the listings to guide you.
With or without the barn door hardware these DIY bifold barn doors look great!
This turned out to be a great project and I hope you enjoyed it as much as I did! As always, go create, have fun, and “find the beauty within your home.” Thanks for stopping by the blog today and every day! We love having ya! Until next time friend.

Make sure you are following along on Social Media and Email!
Pin it for Later
Frequently Asked Questions or Concerns
Some people were concerned about the original track and hardware not being able to hold the added weight of the door. We didn’t run into this issue since the thin underlayment does not add a lot of weight. We did not change out our tracks.
What if I have a sliding closet door and want to make it a sliding barn door? With bypass doors, you just have to make sure there is enough space in between the doors. The thin underlayment wood will add some width to the door. So just measure the space you have to still be able to slide the doors easily. Then add the additional wood width and see if it is possible. If you have the space, go for it!
What if I have metal bi-fold doors? I have not tried this but I was wondering if just liquid nailing the wood to the metal doors would work. You can still use the thin underlayment wood I used. Maybe I should do a test project and just try it out.
What does the back of the door look like? You do not do anything to the back of the door. So it will look like the original bi-fold door. No one will ever see the back of the door.
Will this work with a single door? Absolutely! Just do the same process but you only have one door to do.
I hate my bifold doors but these are absolutely gorgeous! I’m going to attempt this soon! Thank you so much for sharing these step-by-step instructions!!!!!
Beautiful job I’m going to try and get my hubby to do this to my bifolding doors thanks for sharing
Awesome thank you
Thank you for sharing. Great idea.
Lovely!!
Love these doors!! The paint job is perfect for your style..Great job!!
These turned out amazing! I love that you use the original doors to create it and don’t have to throw them out. Great job!
I love this idea! You’ve given me hope that there’s an affordable and beautiful replacement for my current bifold doors.
Great idea! Thanks for sharing 🙂
Thank you Emily!
Very cool project! Thanks for sharing 😉
Thank you Marta!
Thank you for the tip and the easy to follow directions. This is exactly what I was looking for for my doors but I’m wanting to make them into pocket door. 🤩🤔💭💡
Hi Sarah! Thank you so much! Are you doors already pocket doors? The thin underlayment wood would probably still work on pocket doors since it is so thin.