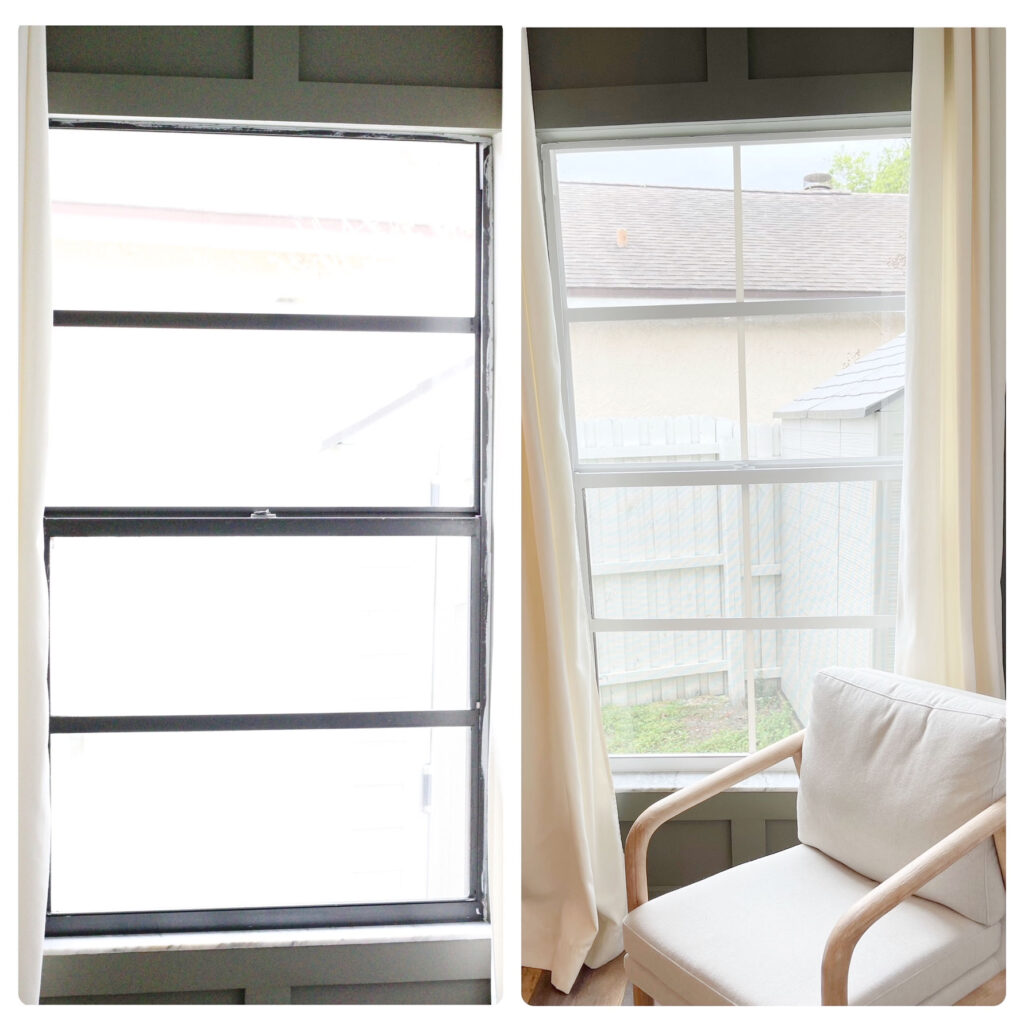
This window refresh was a simple and affordable DIY project. I am going to show you how to update a window for $5 with this easy tutorial!

Learn how I made this beautiful DIY window refresh with this easy tutorial. All you need is a little paint and some vinyl electrical tape, and you can recreate this look. The best part is that it only cost me $5! Let’s go over the details.
Is This Tutorial For Me?
There are two parts to this window refresh, painting the trim and adding grids to a window. Maybe you want to paint your trim and not add grids. Or maybe, you want to add grids and not paint. Or you might be crazy like me and want to do both! Either way, this tutorial is for sure for you!
If you are like me, I have one last window that needs to be replaced, but now the budget isn’t there to replace it. My outdated, single pane windows were black, and all my new double pane windows are white. This was a great way to update my last window to flow with the rest of the windows and on a budget.
Maybe, you have updated windows but they are white and you wish they were black. I get that too. This tutorial can work for updating outdated windows or just changing the look of your windows to your preference.
Last but not least, you don’t want to paint your windows at all but you did like the idea of adding the inside grids. Well this tutorial is still for you! You can use my nifty vinyl electrical tape hack and just add grids to your windows. If this is you, you can skip to step five.
For anyone of these scenarios, you are in the right place!
DIY Window Refresh Supplies and Tools
Sandpaper (We used 220 grit)
Primer
Paint
Pencil
Scissors
Step One: Prep Your Window
First, clean your window and remove any dust or dirt.
Next, you will need to sand your window trim. You want to just rough it up a little bit so that the paint will stick. We used 220 grit sandpaper.
After you sand, you can then start taping off your window to prepare to paint. You will want to tape off around the trim so that you don’t get the paint on the walls.
Now, you are ready to paint!
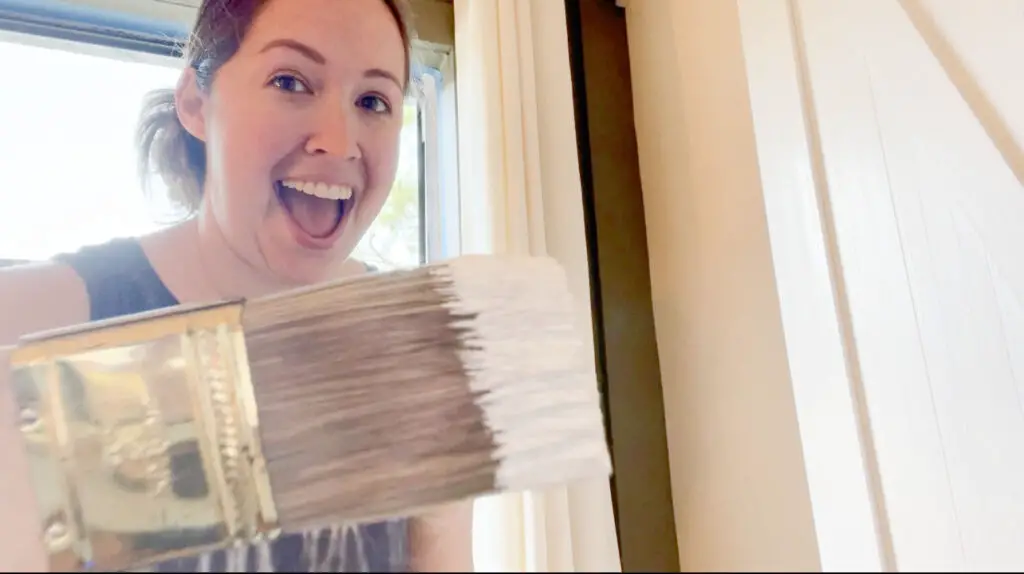
Step Two: Paint Your Window Trim
If you are a DIYer or have renovated your home then you likely have some leftover white paint lying around. I did! That is what I used for this project.
I used a bonding primer and a latex white paint.
Note: Make sure to research if the type of paint you have on hand is ok to be used on the type of material you have for your window trim.
I used a small paint brush. I did one coat of primer and waited till it dried completely before I painted again.
Then, I did two coats of paint. I waited for it to dry completely before applying my next coat.
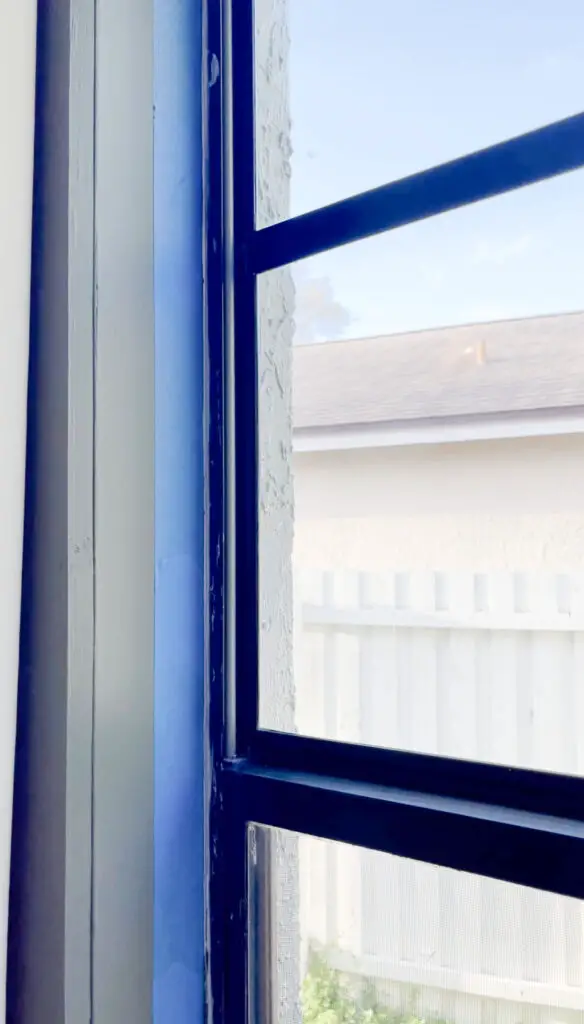
Step Three: Score the Edges Where the Window Opens
You will want to score the edges where the paint globbed up (not sure if that is the correct technical term haha). I would score any edges where the window will open. If you skip this step, you risk having some paint rip off when you do open your window.
Once you have scored all the edges, you can open your window. This is a good test to see how the paint will hold up. You can then do any touch ups as needed.
Note: We do live in Florida, so the window I painted is not opened very often since our weather is in the 90s quite often. It will not be a window we open frequently. However, it did open and functioned fine after it was painted for those that are curious.
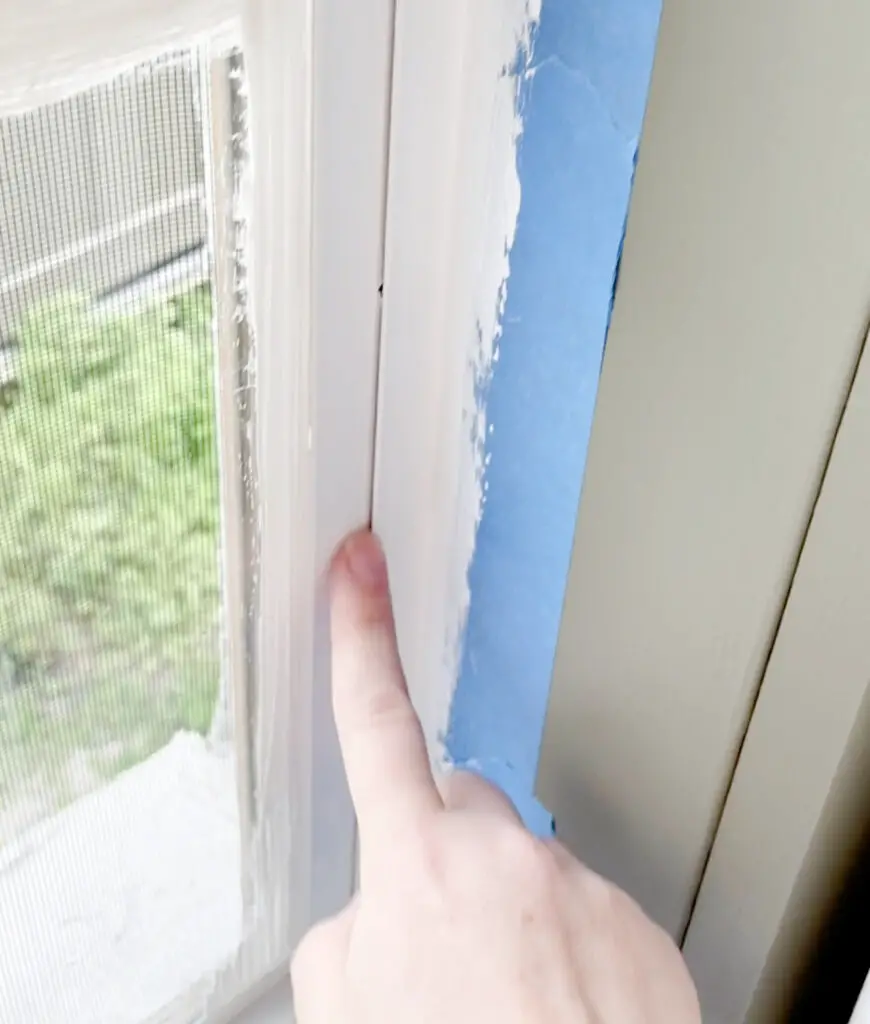
Step Four: Scrap Off Any Paint on the Window
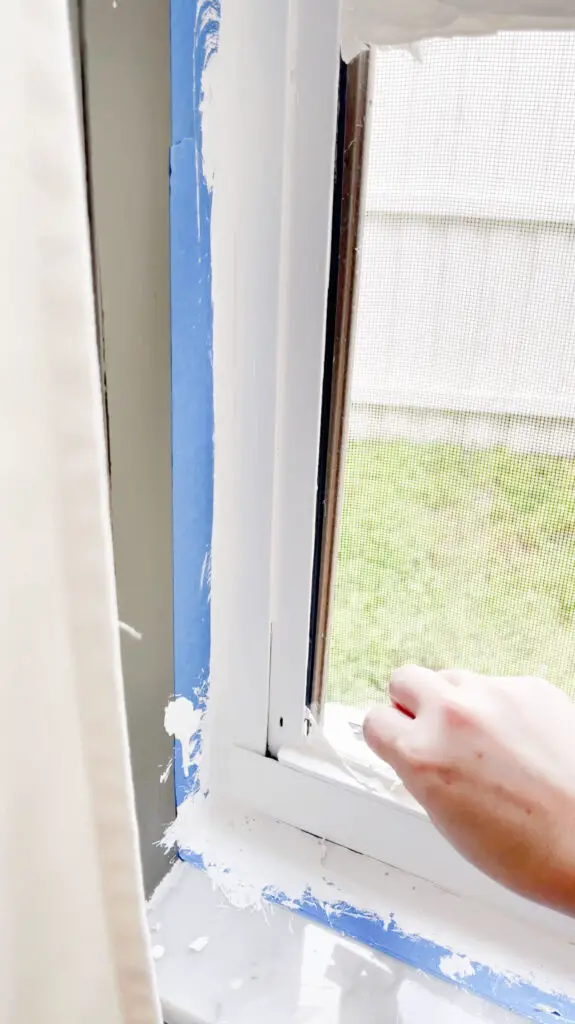
We did not tape off on the actual window itself. We knew that paint would just scrap off with a razor blade. So that is what we did. We scored the edges and scraped off any paint. Just hold the razor blade at an angle and scrape it off. It comes off pretty easy.
You can also remove any painters tape at this time.
Step Five: Add Window Grids Using Vinyl Electrical Tape
You have your window painted and it looks amazing! Or your window looked amazing to begin with and didn’t need the paint. Now you are ready to add some grids. You will want to decide how many grids you are adding based on your window size. My window actually already had the grid going across horizontally. So, I knew I only had to add one vertical grid going all the way down the window.
You will need a measuring tape, a pencil, a level, the white vinyl electrical tape, scissors, and a razor blade.
Step Six: Measure Your Window
You will first need to measure the width of your window and find your center. Once you have found your center, you can make a tiny mark with your pencil so that you know where it is.
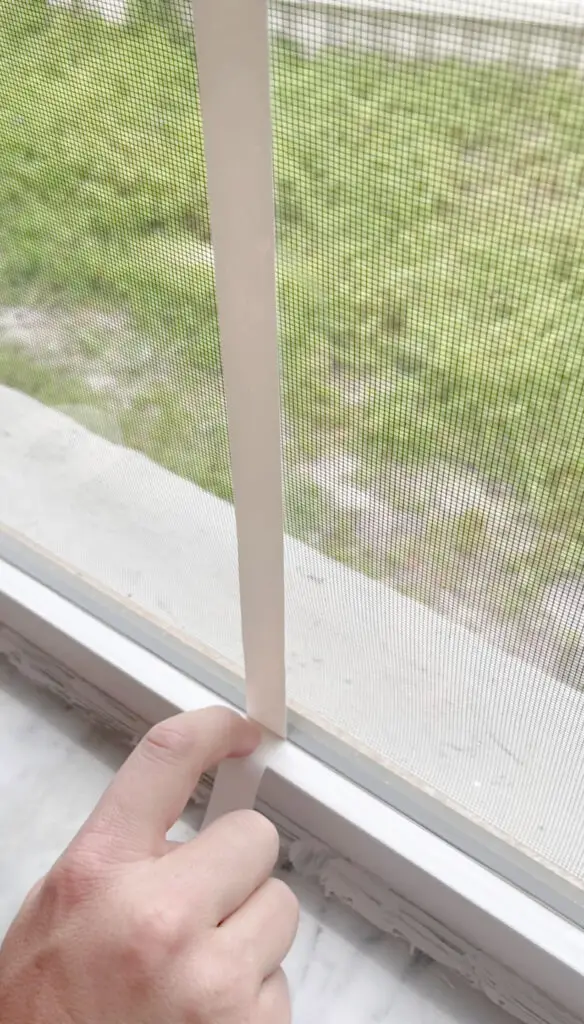
Step Seven: Line Up and Level the Vinyl Electrical Tape

You will want to line up the vinyl electrical tape over the center you marked. Only attached the top part and leave the bottom part hanging. You will do this so that you can use the level and level it before pushing the strip down and attaching it to the window.
Note: You do not want to pull it too tight, there could be some shrinking of the tape and you want to allow for that. Once you get it aligned and leveled, you will push it down and get any bubbles out.
This part can be a little tedious but take your time and get it leveled before you push it down. Also, remember that you have a whole roll of vinyl tape so if you mess it up you can always redo it.
Step Eight: Cut Off Any Excess
Once your tape is in place, you can cut off any excess with a razor blade. I did not cut mine exactly lined up with the trim, I let it hangover the trim a little just to make sure I do not cut it too short. If you cut it too short, you will see a gap in between the grid and window trim. If my explanation isn’t clear on this step, you can always see my explanation in the video below.
Now that you have added your grid going vertically, if you also need one to go horizontally, you will just follow the same steps as above.
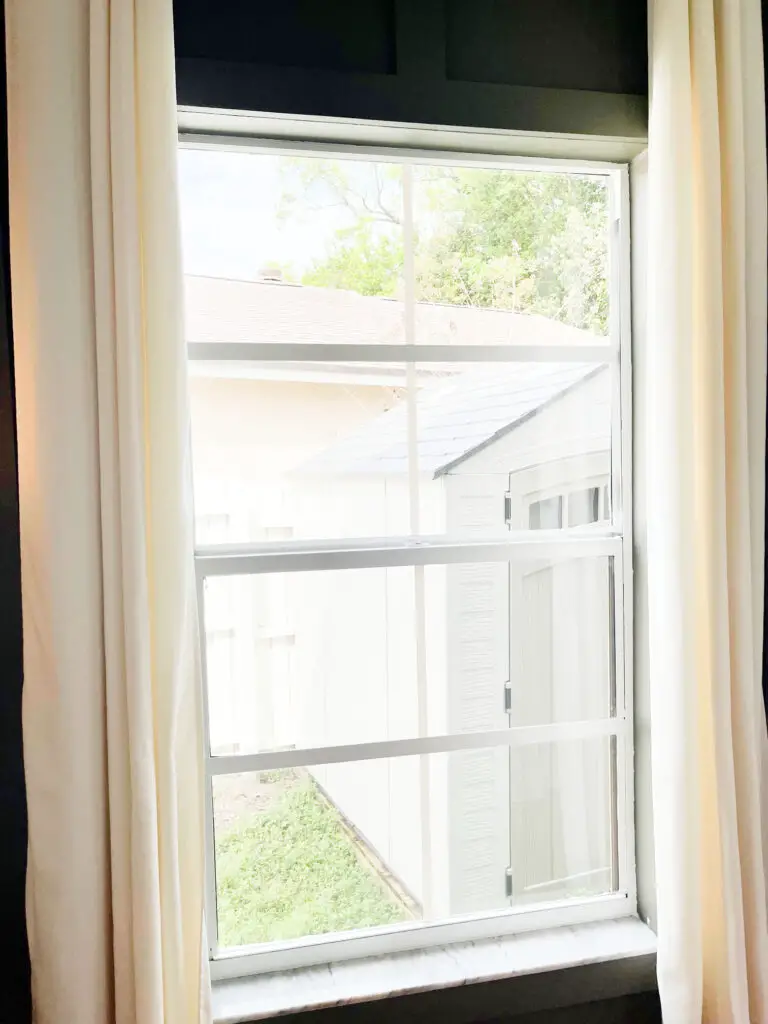
Your DIY simple window refresh is complete and it looks beautiful! No one would guess that it was vinyl electrical tape. You made your window look beautiful and even a little fancy for just $5! I hope you enjoyed this budget friendly DIY project. Thanks for stopping by my faux Florida farmhouse!
DIY Window Refresh Video Tutorial
I also did a step by step video tutorial that you can find below.
If you like my video, please like and subscribe to my YouTube channel.
Wow this looks amazing what a difference. I love how fresh it looks with the white. Thanks for sharing your process.